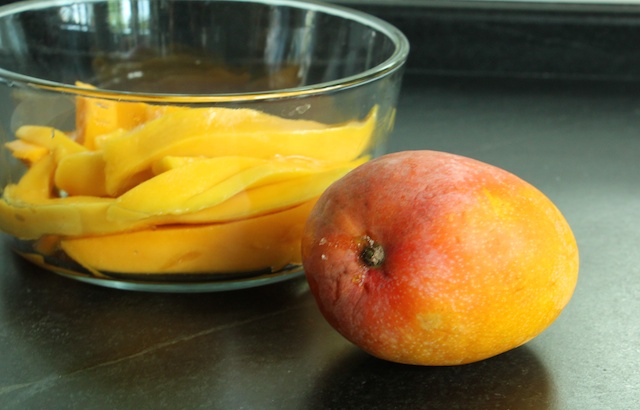
If you’re a mango enthusiast, you probably have your favorite method for slicing mangos. But if you haven’t sliced many, it’s good to have a method in mind before you start. Recently I read each year an alarming number of people go to the emergency room thanks to mangos, especially from slicing them.
There are a few things that make cutting mangos difficult. First, they have a flat pit that runs through the center.
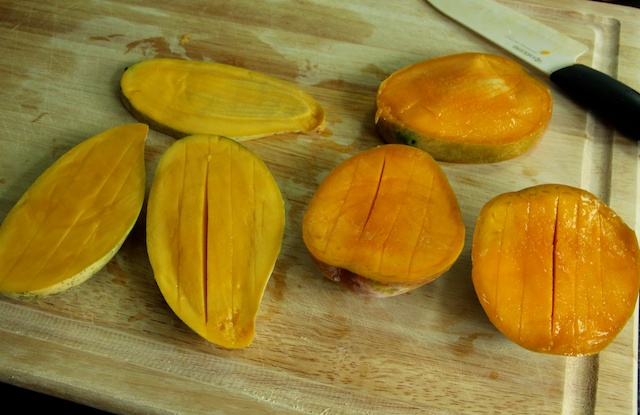
 You need to have an idea about the size of that pit, which varies in size depending on the variety of the mango. You’ll notice that the Nam Doc Mai (above and below, left) has a very thin pit, while the middle section of the Glenn on the right is much thicker.
Another factor that makes them tricky is that once you begin slicing them they release lots of juice. If you use a vegetable peeler to remove all the mango peel first, you’ll be left with a round slippery object on top of a wet cutting board. I can see how that might be dangerous.
The most popular mango slicing method is known as the ‘hedgehog.’ You begin by slicing the cheeks off each side of the pit, then you score the flesh of each cheek in a grid pattern. Next you invert the cheek, which makes all the little squares stick up (hence the name). You then slice off all the little squares that are sticking up.
The downsides to the hedgehog: you’re left with small cubes and funny triangular shapes at the corners, each one has to be sliced off individually, and there are little nubs of flesh still stuck to the skin if you don’t cut close enough.
My method begins like the hedgehog, by slicing off each wide, flat cheek. Slowly slice the fruit away from the pit, just off center of the stem. If you begin to feel the knife too close to the pit or it’s getting stuck in it, start again or move it over a little.
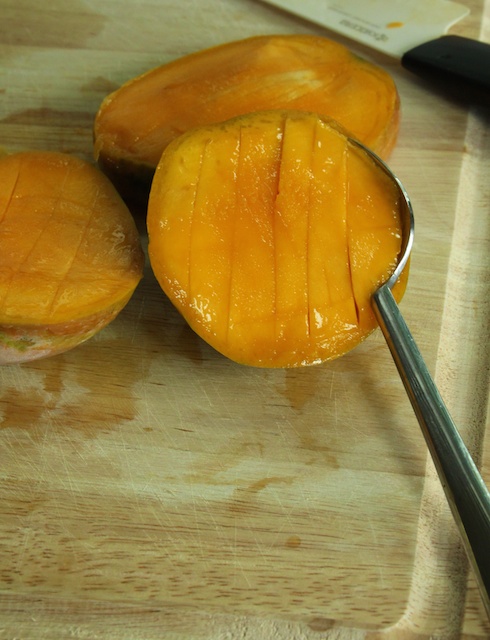
Now you’ve got two cheeks. Score the flesh of each lengthwise only. Use a spoon to scoop out the slices. Press the spoon firmly in between the peel and the flesh, pulling it away from the skin.
Remember that middle section with the pit? Go back to that and slice off each side of it, then scoop the flesh away from the skin, which gives you two more slices. And if you can’t stand wasting a single bit, you’ll find a couple tasty morsels at the top and bottom of the pit.
If you want to freeze mangos for the year, arrange slices in one layer in a freezer bag and try to squeeze most of the air out before you close it. Lay the bag flat in the freezer. Now it’s ready for smoothies, mango key lime daiquiris and mango ginger mojitos. If you don’t want to use the entire bag, you can just break off the amount you want and re-seal it. 
And one more way to avoid an emergency room visit due to mangos: wear gloves when slicing them to avoid mango rash. Not everyone reacts this way, but if you’re up to your elbows in mango juice without gloves, you’ll find out soon enough.


Pingback: Dehydrated Mango Part 1: Chewy Mango Slices | Suwannee Rose
Pingback: Raw Mango Key Lime Tart | Suwannee Rose